In this article, we will provide you with the steps to Install Neptune Rising Addon on Kodi 17.6 Krypton. If you are using an older version of Kodi, you can still follow the steps as it works on that too. Neptune Rising is one of the working Kodi Addons that provides you with a wide range of entertainment contents. It is one of the Addons that offers 4K video streaming. You can access all the latest contents at the higher quality through this addon. Neptune Rising has the user-friendly interface, that is easy to use even for the new Kodi users.
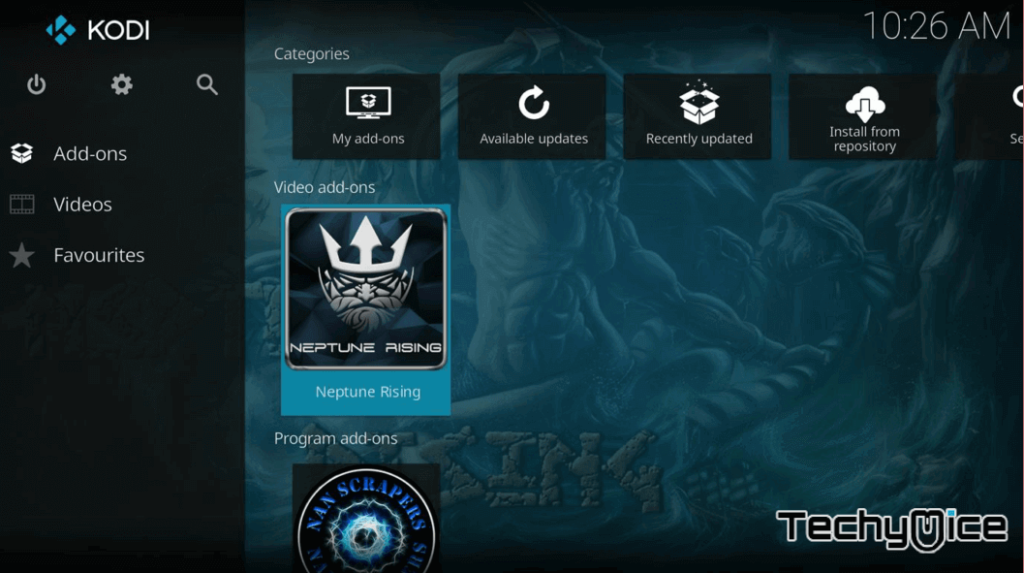
Neptune Rising gives you a large variety of Movies and TV Shows. It is one of the highly recommended
How to Install Neptune Rising Kodi Addon?
Since the Neptune Rising is a third party addon, you need to turn on the ‘Unknown Sources option‘ on your Kodi App. To do this go to Settings System Settings > Addons > Unknown Sources > Turn On. After turning on the Unknown Sources option, you can follow the steps given below.
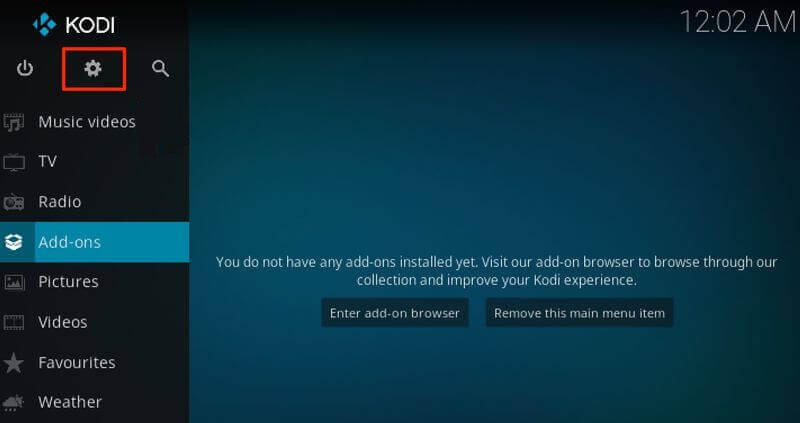
Step 1: Launch your Kodi App, then Click on the Settings icon on the top left of the Kodi home screen.
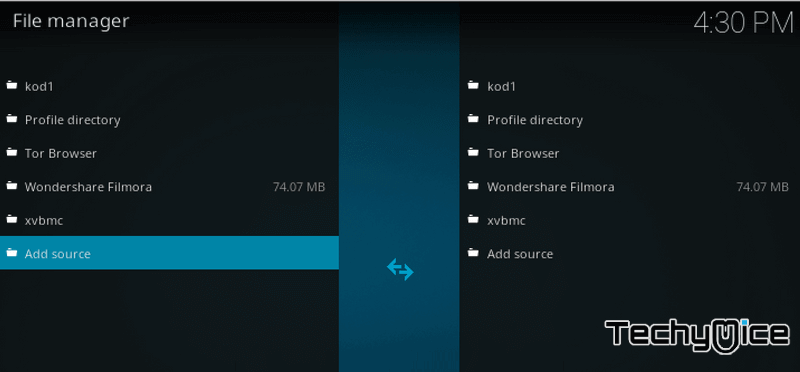
Step 2: Click on the File Manager and click on the ‘Add Source‘ option.
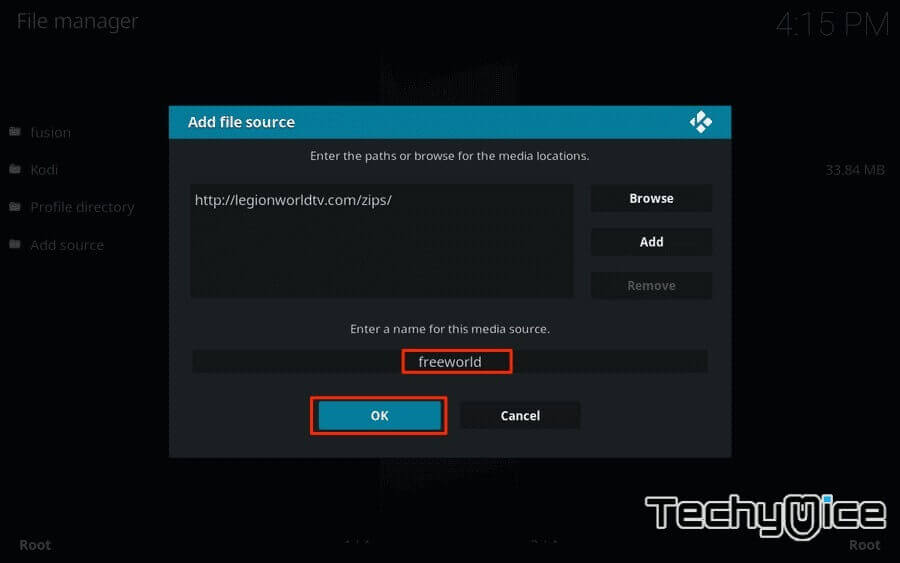
Step 3: In the pop-up screen, click on ‘None’ and then type in the MRFreeWorld Repo URL – http://legionworldtv.com/zips/ and click on OK button.
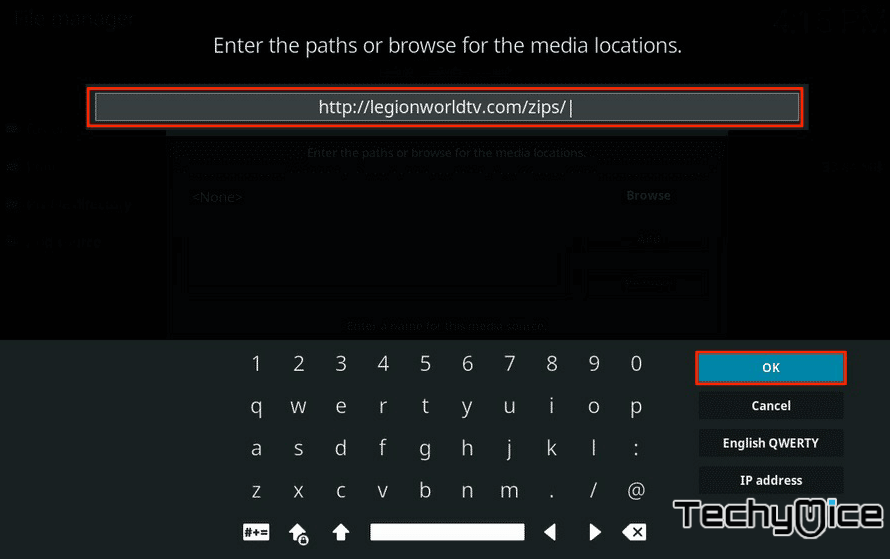
Step 4: Now and give a name for the repo as ‘freeworld‘ and click the OK button.
Step 5: After entering the details, check again, whether you have entered properly. and then click on OK.
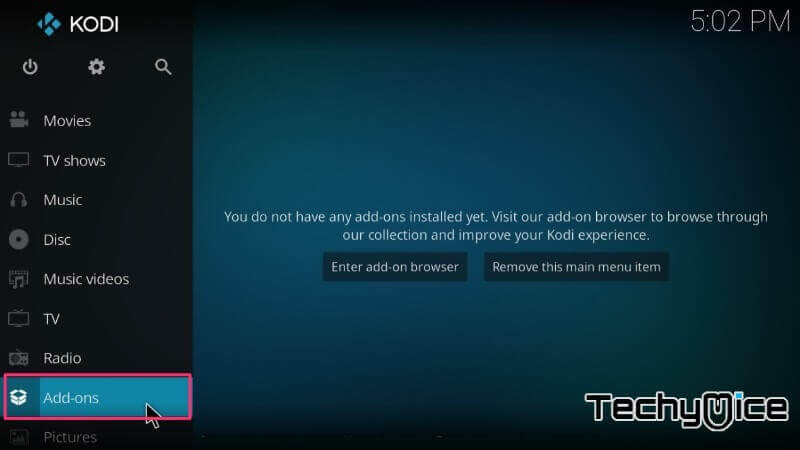
Step 6: Head back to Kodi home page and click on the “
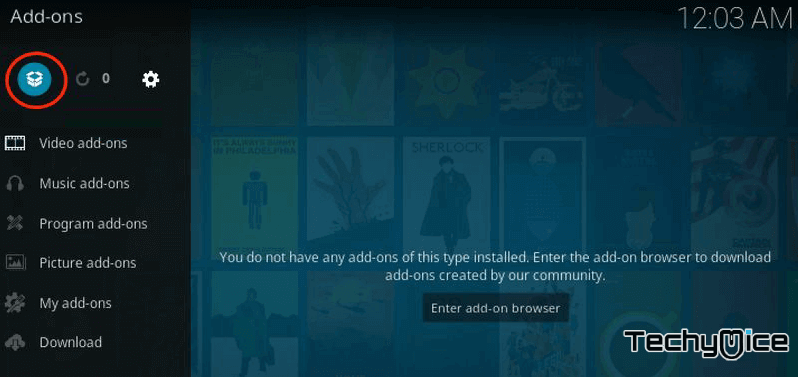
Step 7: Then click the package installer icon on the top left of your Kodi homepage.
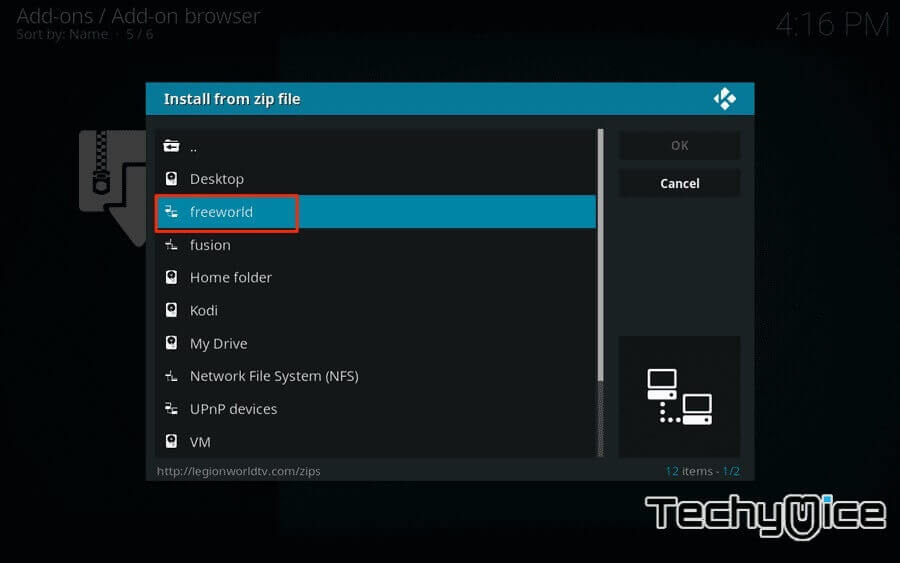
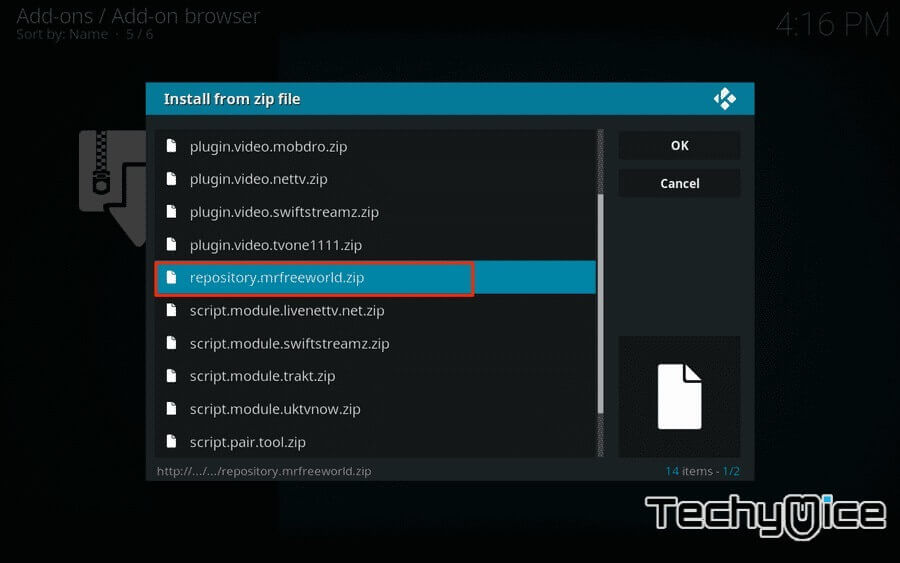
Step 8: Click on the ‘Install from Zip file’ then select ‘
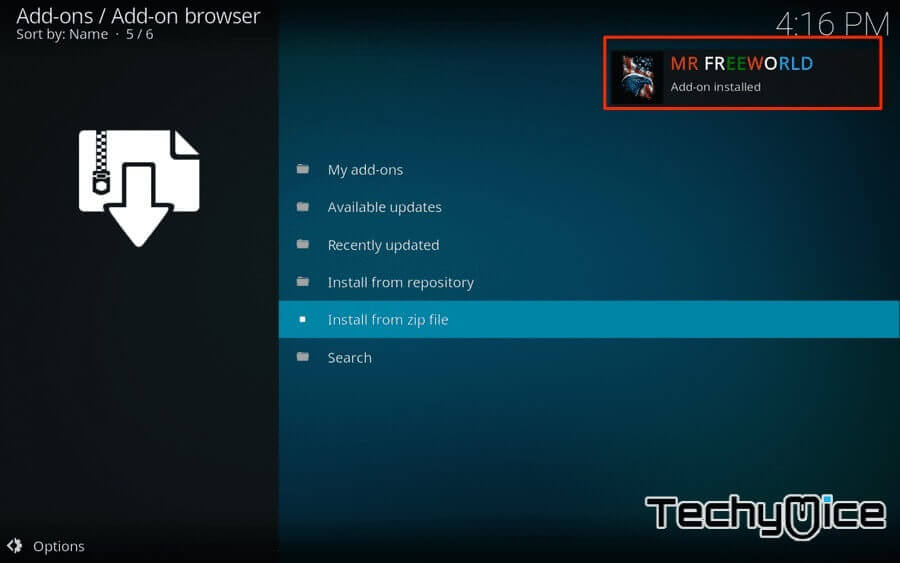
Step 9: Now click on the repository.mrfreeworld.zip to install the repository on your Kodi app.
Step 10: Wait for few minutes until the MR FREEWORLD addon gets installed on your device.
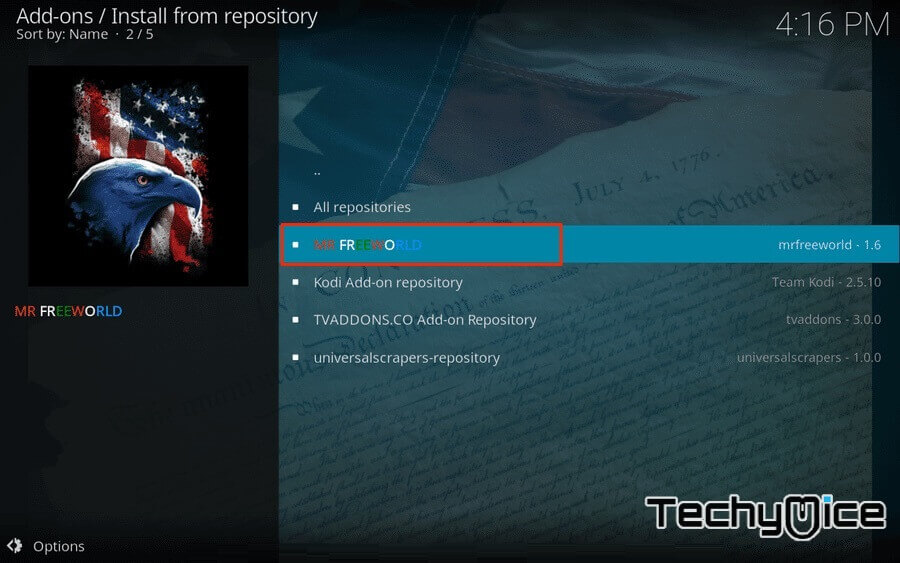
Step 11: Now click on the ‘Install from Repository’ option.
Step 12: Then choose the ‘MR FREEWORLD’ repo file.
Step 13: Then click on the ‘Video
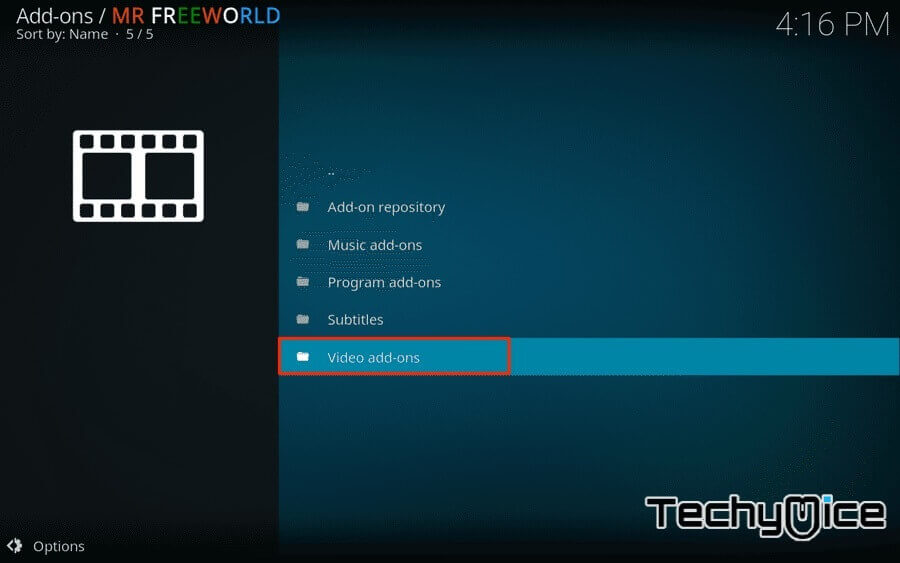
Step 14: Select the ‘Neptune Rising‘ Addon.
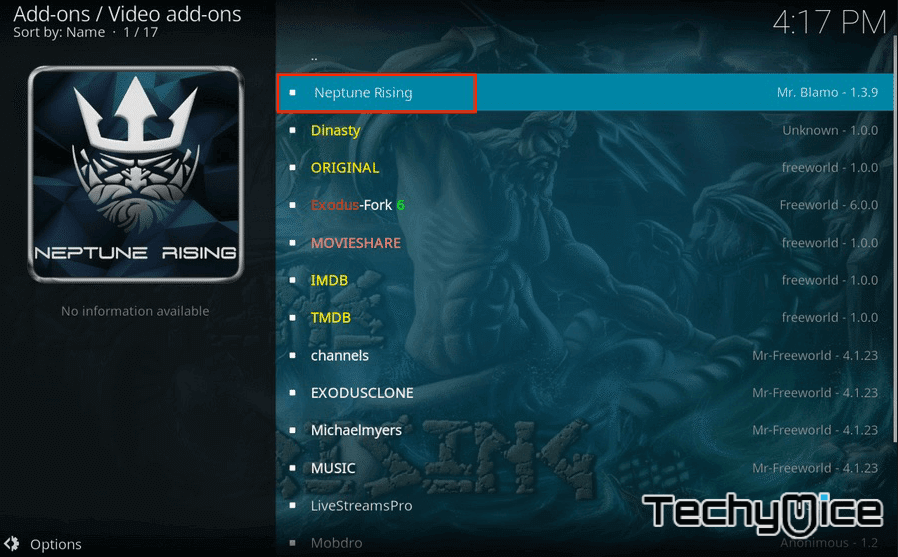
Step 15: Now click on the “Install” button to install the addon on your device.
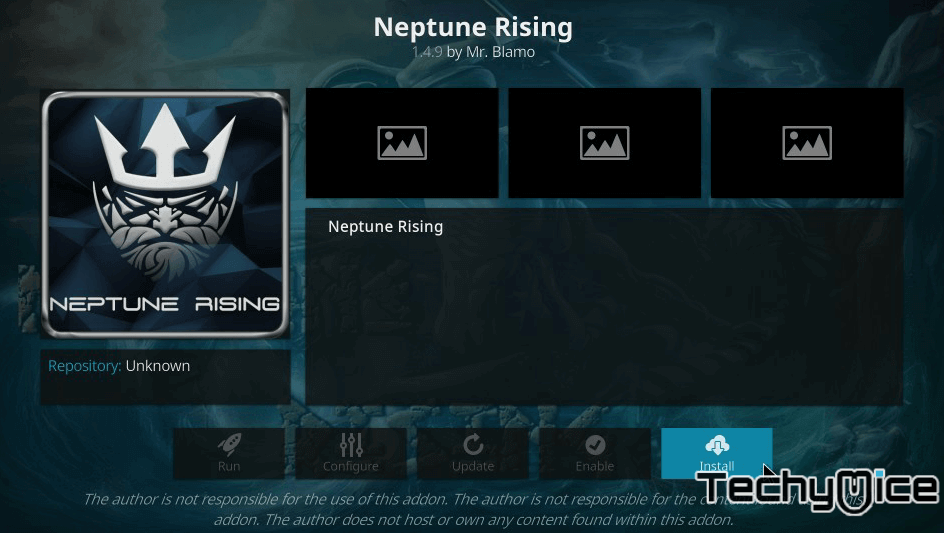
Once the installation is completed, then you can start streaming your favourite contents on your Kodi installed device.
Fixing Neptune Rising not working 2019
Many Kodi users may face Neptune Rising Not working error, to solve this issue the first thing you have to ensure that you have the latest version of Kodi and turn on for the auto-update So that it will be updated automatically.
There are many ways you can use to fix the Neptune Rising not working problem on your Kodi Krypton and also on the Jarvis versions. But before solving this issue you should update your addon using the following steps.
Step 1: Launch the Kodi app.
Step 2: Then go to the Addon section and Right-Click on the ‘Neptune Rising’.
Step 3: Now click on ‘Information‘ and click the ‘Update’ button.
Step 4: Here you can select the latest version ‘1.4.7 Blamo Repo’
Step 5: Just click on it to update soon. Now you can see a pop up on your screen.
Fixing Neptune Rising No Stream Available 2019 Error
Neptune Rising No Stream Available is the most common error that Neptune Rising users face. To resolve this error just follow the steps below.
Step 1: Head to your Kodi Home Screen.
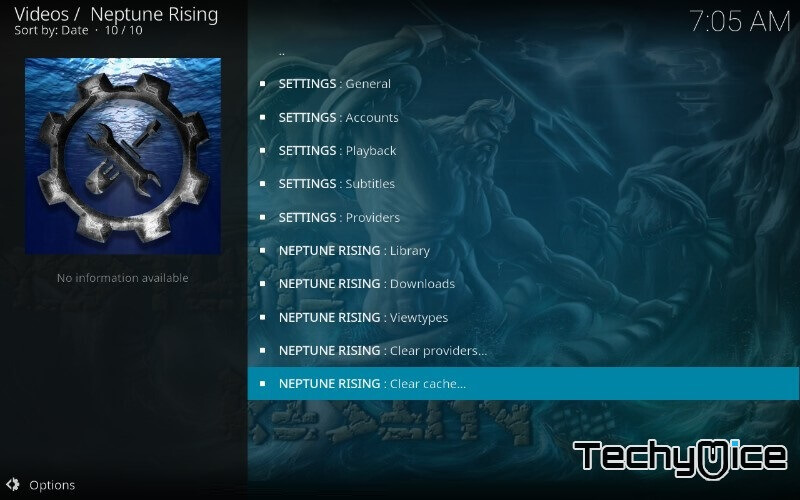
Step 2: Right Click on the updated Neptune Rising Addon. Then click ‘Tools’
Step 3: Now click on the Neptune Rising: Clear Cache> Are you Sure. Then click on Yes.
Step 4: Now select the Neptune Rising: Clear Providers > Are You Sure. Again click on Yes.
Step 5: Now head back to the ‘Kodi Home Screen’ and right-click on the Neptune Rising and click on Settings.
Step 6: Just ensure that the ‘Providers Timeout should be 20’. Then click the OK button.
Step 7: Then Click the ‘Playback’ option, then click the Turn Off button and Hosters With Captchas’.
Step 8: Go to the ‘Library’ here you have to ‘Turn On’ the option ‘Check Movie Before Adding It’ and click on OK button.
How to fix Neptune Rising failed to install a dependency?
Neptune Rising failed to install dependency i another issue that is being faced by the most Kodi users. To solve this issue, simply follow the steps given below.
Clear Kodi Cache
Clearing the cache of Kodi is the simple and most effective method to resolve the ‘Neptune Rising Failed to Install a Dependency‘ issue. All you need to do is to clear the Kodi’s cache. Even if this doesn’t fix the issue completely, this action could improve the stability of the application and resolve the playback issues. Here is how you can do this on different Kodi compatible devices:
Windows / Mac / Linux: The best way to clear cache on desktop platforms is by using the addon named ‘Indigo‘. Once after installing Indigo Addon on your Kodi, you can clear its cache by heading to the ‘Maintenance Tools‘.
Amazon Fire TV / Fire TV Stick: You can clear cache on your Fire devices by heading to Settings > Applications > Manage Installed Applications > Kodi. Then finally, click on ‘Clear Cache’.
Android Boxes: You have to open the Settings on your devices, and then go to Apps > Kodi. Here you can find the button named ‘Clear Cache’. Simply click on it and confirm your action.
Nvidia Shield TV: Many of you may know that you can easily install Kodi on Nvidia Shield devices. Since it is powered by Android, here you need to go to Settings > Apps > Kodi > Clear Cache.
Thanks for reading this post by TechyMice, If you have any queries or suggestion please leave that in the comment box below.
![How to Install Lowrider Kodi Build? [2024]](https://www.techymice.com/wp-content/uploads/2022/09/How-to-Install-Lowrider-Kodi-Build-2-60x57.jpg "How to Install Lowrider Kodi Build? [2024]")